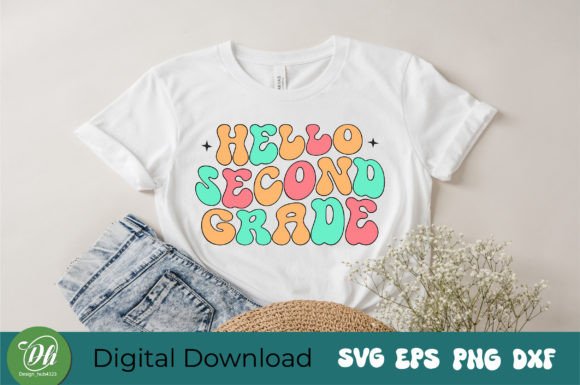
Hello Second Grade Retro SVG
If you're crafting for back-to-school season—or just love nostalgic, cheerful design—the Hello Second Grade Retro SVG is more than a trend. It’s a versatile, ready-to-use digital asset that brings warmth, personality, and classroom charm to physical products and digital projects alike. Whether you're printing on t-shirts for a teacher appreciation event, designing custom tumblers for your small business, or adding playful flair to scrapbook layouts, this retro-inspired design delivers consistent visual appeal without demanding advanced design skills.
What This File Set Actually Offers (and What It Doesn’t)
The Hello Second Grade Retro SVG download includes four file formats in one zip: an SVG (ideal for Cricut Design Space and Silhouette Studio), an EPS (best for vector editing in Adobe Illustrator or CorelDRAW), a high-resolution PNG with transparent background (great for print-on-demand platforms or quick overlays), and a DXF (compatible with older cutting machines and some CAD software). That’s thoughtful coverage—but it’s not magic. These files won’t auto-adjust color accuracy across devices, nor will they scale infinitely without checking proportions manually. And while the design is clean and legible at standard sizes, shrinking it below 2 inches may blur fine retro details like halftone dots or subtle line weight variation.
A Common Misstep: Assuming “Retro” Means “Universal Compatibility”
Many buyers assume “retro style” automatically translates to broad software support—only to discover their preferred app doesn’t render SVG filters correctly, or their vinyl cutter misreads embedded layers in the EPS version. For example, one educator tried uploading the SVG directly into Canva—only to find text elements rasterized and uneditable. The fix? Open the SVG first in a vector-native program (like Inkscape, which is free), simplify paths if needed, then export as a flattened PNG for Canva use. Always test one format before bulk-cutting or printing.
Color Expectations vs. Reality
The note “Actual colors may vary slightly due to monitor settings” isn’t boilerplate—it’s essential context. A warm mustard yellow on your screen might print as a muted ochre on cotton tees, especially with sublimation or DTG methods. If color fidelity matters (e.g., matching school branding), open the PNG in your editing software and use the eyedropper tool to verify HEX or RGB values before sending to production. Better yet: order a single test print from your vendor using the exact file and material you plan to use. Skipping this step has led more than a few small-biz owners to reprint entire batches of tote bags with off-tone lettering.
Overlooking File Integrity Before Use
It’s easy to unzip, drag-and-drop, and assume everything’s ready—until your Cricut machine pauses mid-cut because the SVG contains hidden anchor points or non-unified compound paths. To avoid wasted time and material: inspect the file in your design software *before* resizing or layering. In Silhouette Studio, use “Release Compound Path” and “Weld” only after confirming all letters are grouped intentionally. In Cricut Design Space, check the Layers panel—some retro fonts include decorative outlines as separate objects; deleting one unintentionally removes dimensionality. A 60-second review saves 20 minutes of troubleshooting later.
Why Format Choice Matters More Than You Think
SVG is convenient, but it’s not always optimal. If you’re laser-engraving wood or acrylic, EPS or DXF often yields cleaner vector paths and avoids rendering glitches. Similarly, PNG works well for stickers or social media graphics—but never for cut files requiring precise edge definition. One freelance designer learned this the hard way when she used the PNG for vinyl decals: the anti-aliased edges caused slight bleeding during weeding. Switching to the SVG—and turning off “smooth corners” in her cut settings—gave crisp, professional results.
What to Verify Before Downloading or Purchasing
- Licensing clarity: Confirm whether personal, commercial, or extended commercial use is permitted—especially if selling finished items on Etsy or Amazon. Some sellers bundle files with limited licenses, even if the design looks identical to others priced higher.
- File naming & organization: Well-named files (e.g., “Hello_Second_Grade_Retro_SVG.svg”) save time versus generic labels like “design1.svg.” Check the zip contents before purchase—if filenames are unclear or inconsistent, support responsiveness may be similarly haphazard.
- Preview accuracy: Compare the online thumbnail with the actual PNG preview included in the download. Some listings show stylized mockups that don’t reflect the true line weight, spacing, or retro texture of the vector file.
- Software version notes: If the listing mentions compatibility with “Cricut Design Space v6+” or “Silhouette Studio 5.0,” double-check your installed version. Older versions sometimes lack SVG import features entirely.
Getting the Most Out of the Design—Without Overcomplicating It
You don’t need to master every file type to succeed. Start simple: use the SVG for cut projects, the PNG for digital sharing or print-ready PDFs, and keep the EPS handy only if you anticipate heavy editing. If you’re new to vector workflows, spend 10 minutes watching a beginner tutorial on grouping, ungrouping, and changing fill/stroke in your chosen software—just enough to understand how the retro elements (like outlined letters or dot-matrix accents) behave when resized.
And remember: this isn’t just about technique—it’s about intention. The Hello Second Grade Retro SVG resonates because it evokes growth, optimism, and lighthearted learning. When you apply it thoughtfully—on a student’s first-day-of-class water bottle, a homeschool planner cover, or a teacher’s coffee mug—you’re not just placing a graphic. You’re reinforcing a feeling. That impact multiplies when your execution is clean, accurate, and respectful of both the design’s character and your audience’s expectations.
Final Practical Tip: Keep a “Test Log”
Start a simple spreadsheet or note titled “SVG Test Log” where you record: date, file format used, software version, material, cut/heat/ink settings, and one-sentence outcome (“Clean cut on 65lb cardstock,” “Slight halo on matte sticker paper”). Over time, this becomes your most reliable reference—not marketing copy, not forum speculation, but real-world data tailored to *your* tools and workflow. It turns every project into informed progress.